Site blog
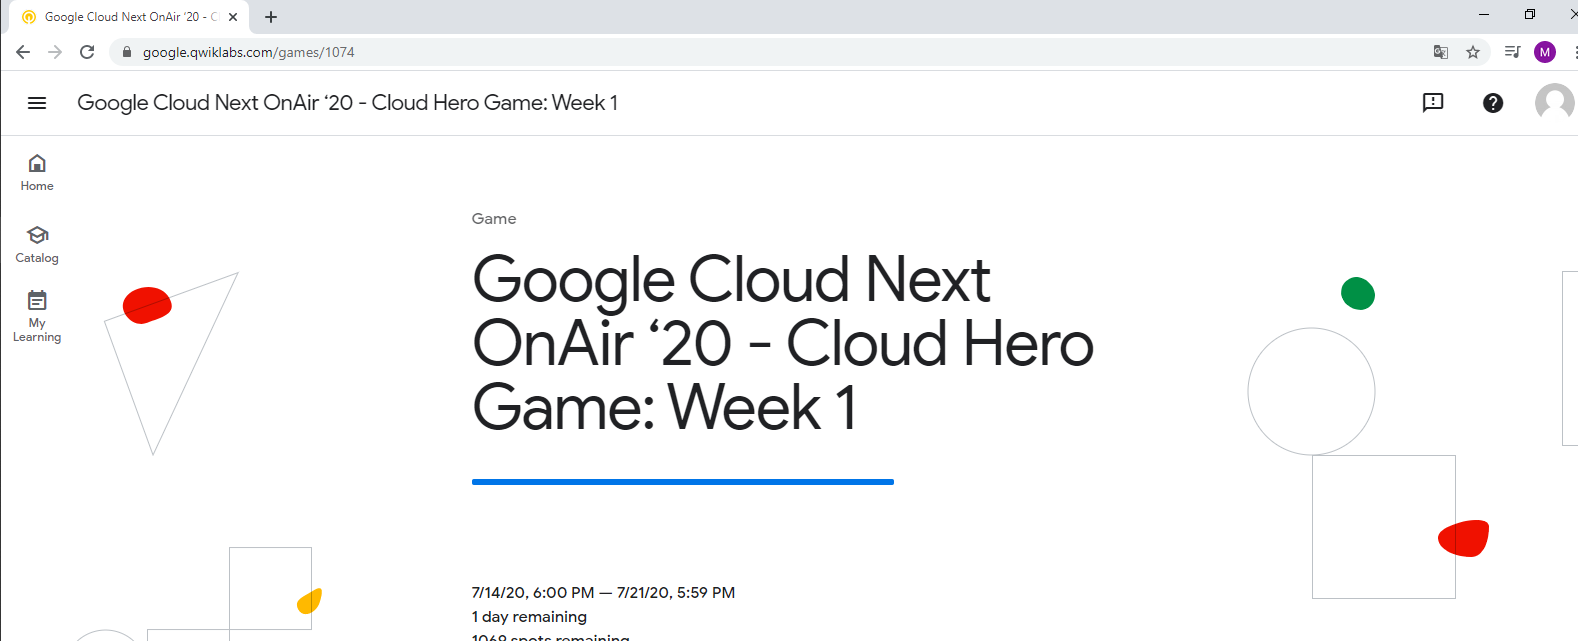
As you maybe have noticed, Google Cloud Next are on air, and so is Cloud Hero Game. First week was about Industry Insights.
The first week assignments was to get through six exercises, from fundamentals-level to expert-level. Each of assigments was timed, and if you completed all the assignments in time, you was honored with a badges:

Assignment 1: Healthcare Lab
In this assignment you created a prediction pipeline using Cloud Healthcare API and AI Platform and trained Tensorfow model. Some Cloud functions was also involved.
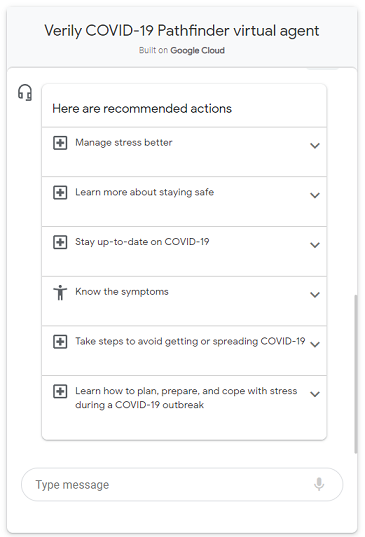
Assignment 2: Public Sector Lab
In this assignment you learn to use Dialogflow to create a conversational interfaces to answer questions about COVID-19 symptoms and provide the latest guidance from public health authorities like the Centers for Disease Control and Prevention and World Health Organization (WHO).
Assignment 3: Retail Lab
In this advanced-level assignment you will use a newly available ecommerce dataset to run some typical queries that businesses would want to know about their customers’ purchasing habits.
Assignment 4: Gaming Lab
In this fundamentals-level assignment, you will install Agones on a Kubernetes cluster, then create a simple UDP game server with Agones.
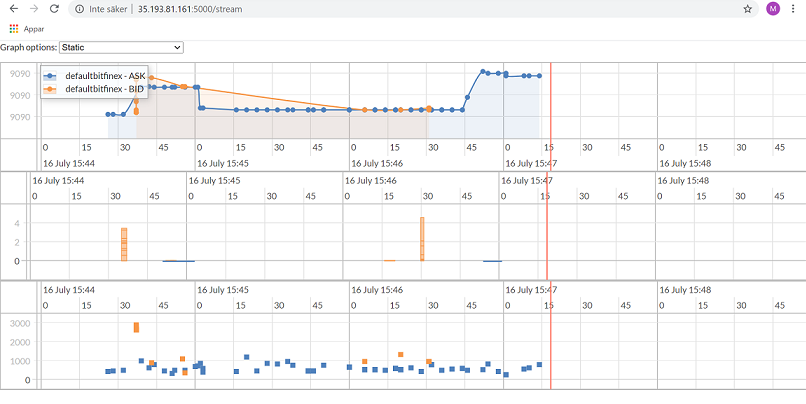
Assignment 5: Finance Lab
In this expert-level assignment, you will use GCP services to help graph trades, volume, and time delta from trade execution to see any patterns in the high volatility of the cryptocurrency market. It was a good assignment, involving Cloud Dataflow and Cloud BigTable.
Assignment 6: Telecommunication Lab
In this expert-level assignment, you will use Cloud Function, BigQuery, Cloud Pub/Subs, Cloud Dataflow and Cloud Data Loss Prevention (DLP). Some hints where in the documentation, but mostly just instruction what you should do.
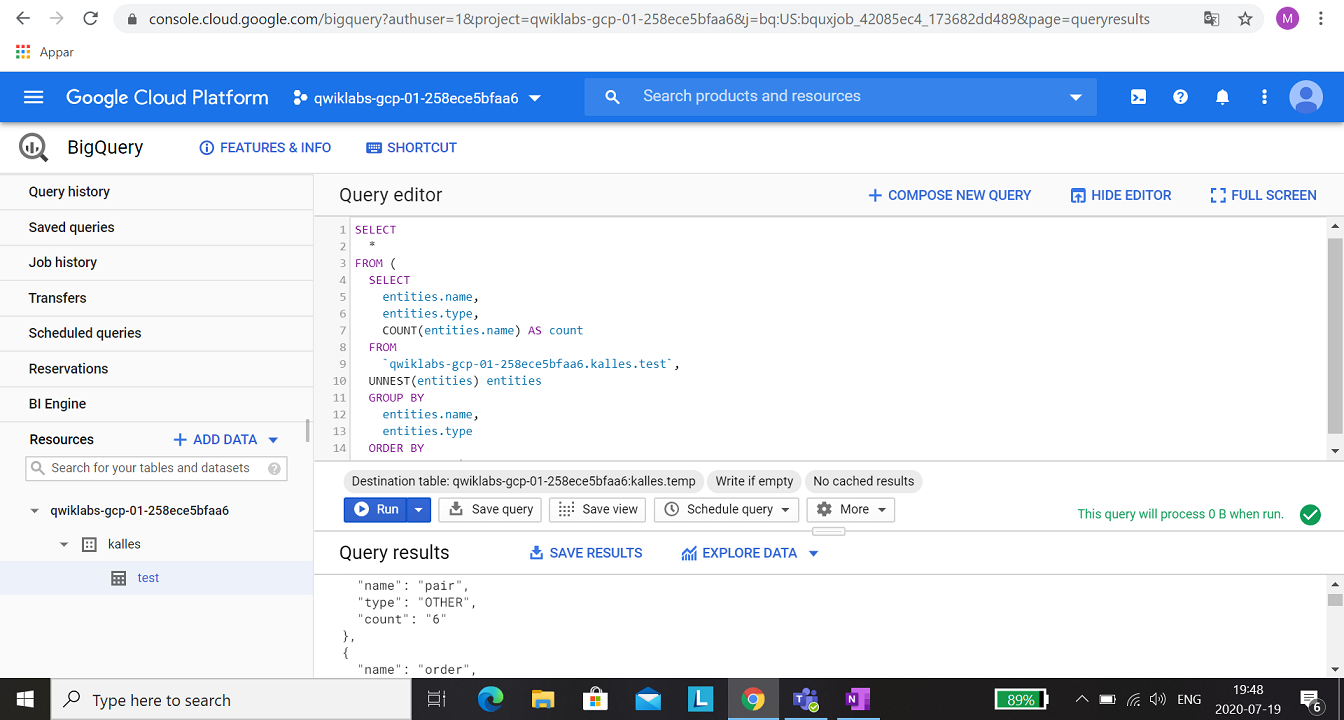
To run a DLP job, a new table with the results have to be created.
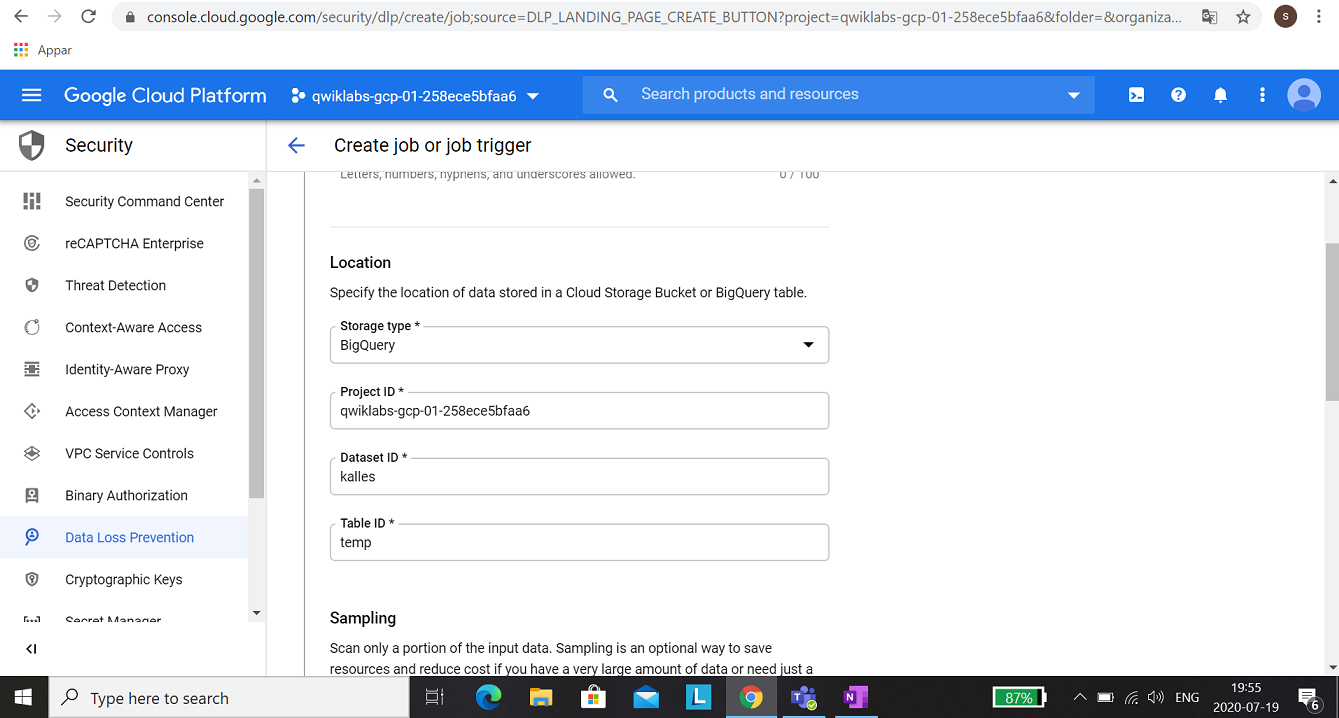
When you have a table, you could configure the DLP job.
Some information about Python was also missing, you have to do:
python -m virtualenv env -p python3
source env/bin/activate
pip install apache-beam[gcp]
pip install dateparser (this one is critical!)
Looking forward to this week Game!

Come across this pdf today, a must read document, not just for GCP. Link to the pdf: https://services.google.com/fh/files/misc/cloud_center_of_excellence.pdf

Prerequisite: Account for GCP and login to the console.
Task 1: Create project and connect to it

1. In the consol, click on Activate Cloud Shell.

2. When Cloud Shell has opened, click on Open in new window to make it easier for you to work in.

3. In Cloud Shell, write the following command and press Enter, to create a project with the name deployment-manager-easec-xx:
gcloud projects create deployment-manager-easec-xx --name="deployment" --labels=type=deployment
Replace xx with your initials. If the name already exist, put in a extra character to make it unique.

4. In Cloud Shell, write the following command and press Enter to move to the newly created project
gcloud config set project deployment-manager-easec-xx
Task 2: Linking billing account to your project
1. Go back to GCP console, click first on your project and then choose Billing in the Navigation menu.

2. Click on LINK A BILLING ACCOUNT.
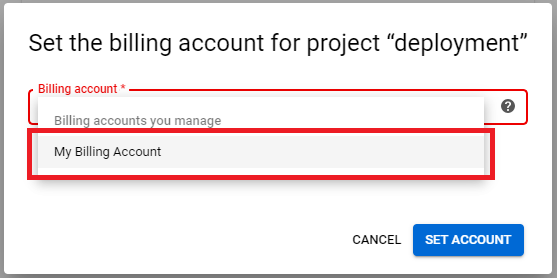
3. Click on dropdownbox and choose My Billing Account, click on SET ACCOUNT.
Task 3: Show and edit .yaml-file for deployment
1. Go back to Cloud Shell, write following command and press Enter to clone .easec:s repository:
git clone https://github.com/easec/gcp/
2. Write following command and press Enter to move to folder gcp/deployment_manger:
cd gcp/deployment_manager/
3. Write following command and press Enter to open simple_template.yaml in nano:
nano simple-template.yaml
Note: there is two resources defined; the-first-vm and the-second-vm.
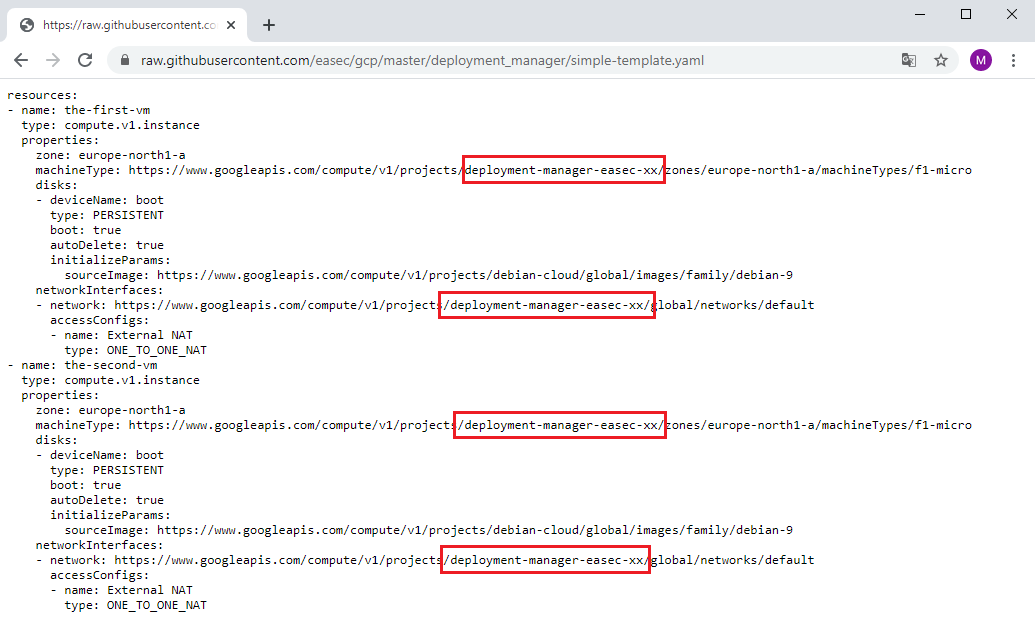
4. Change xx to your initials, it should be the same as the name for your project.
5. Click on ctrl + x to finish nano, write y + Enter to save your changes. Press Enter to confirm the name.
Task 4: Deploy the deployment

1. In the Cloud Shell, write following command and press Enter to activate the API:
gcloud services enable compute.googleapis.com

gcloud deployment-manager deployments create two-vms-1 --config=simple-template.yaml
Answer the question "API [deploymentmanager.googleapis.com] not enabled on project y/n" with a y and press Enter.
Task 5: Verify the deployment
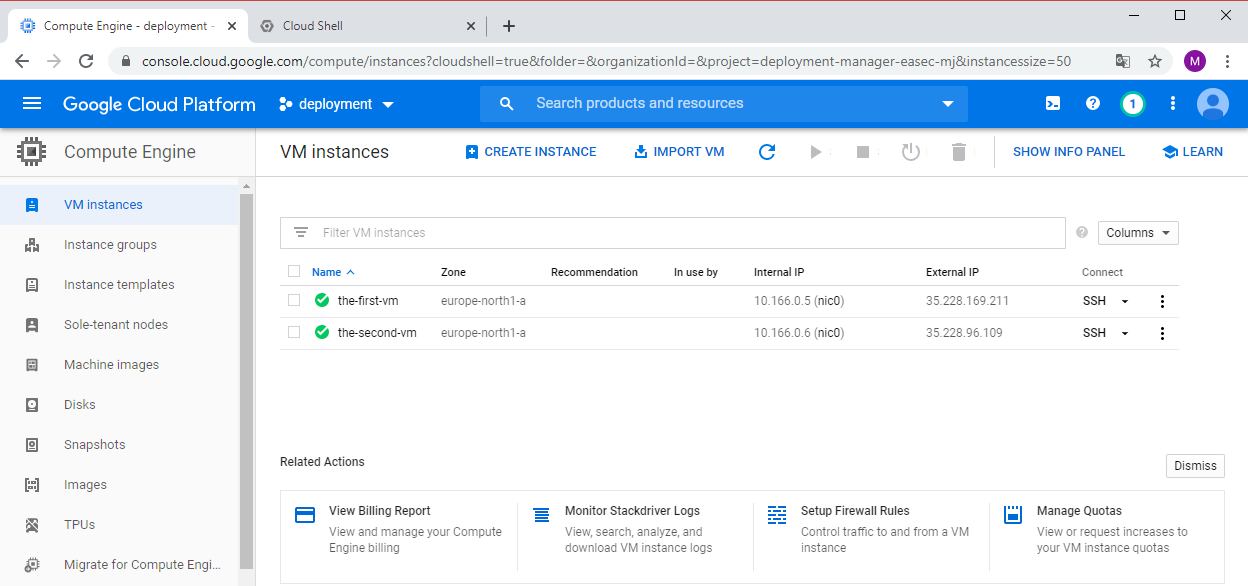
1. Return to GCP Console. In Navigation menu, click on Compute Engine - VM Instances. Verify that there is two virtual machines, the-first-vm and the-second-vm.
2. Click on SSH to connect with SSH to the-first-vm. Verify that you could connect. You could connect becuse the machines use the Default network, this network has Firewall rules that allows SSH.
Task 6: Show manifest for the deployment
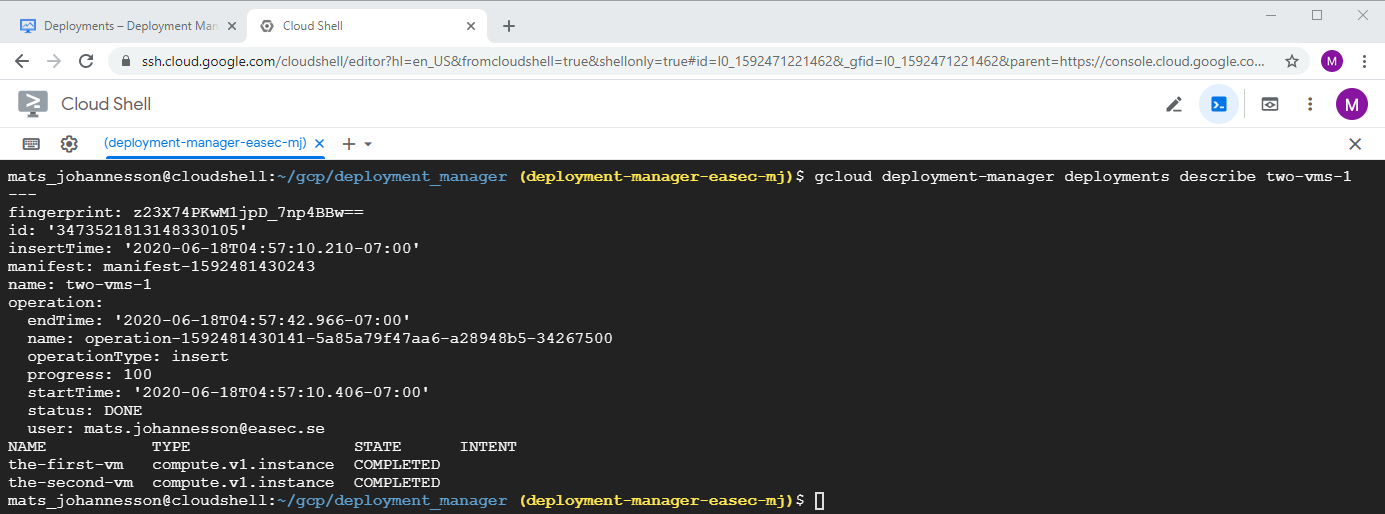
1. Return to Cloud Shell, write following command and click on Enter, to show information about deployment:
gcloud deployment-manager deployments describe
two-vms-1
Task 7: Remove deployment
1. In Cloud Shell, write following command and click on Enter, to show information about deployment:
gcloud deployment-manager deployments
delete two-vms-1
Write y + Enter to confirm that you will remove the deployment.
Task 8: Create deployment with network
1. In Cloud Shell, write following command and click on Enter, to open and edit simple-template-with-network.yaml:
nano simple-template-with-network.yaml
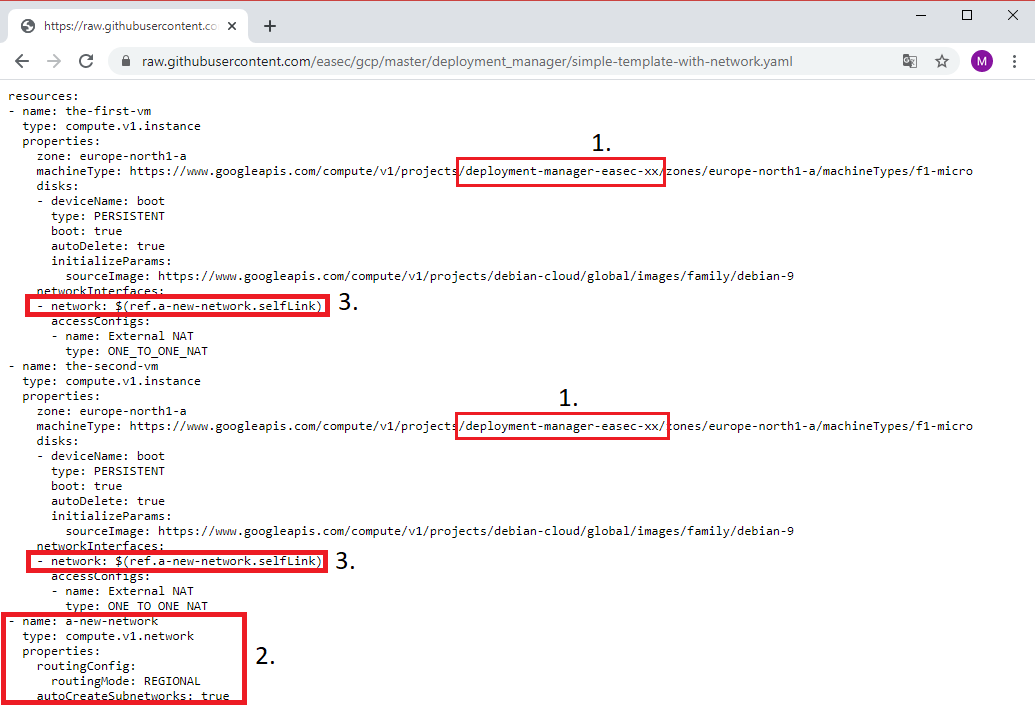
2. Change xx to your initials, it should be the same as the name for your project (1). The network is defined as seperate resource (2) and the I use reference (3) to the defined network for both the-first-vm and the-second-vm. You could read more on references here: https://cloud.google.com/deployment-manager/docs/configuration/use-references (new window).
3. Click on ctrl + x to finish nano, write y + Enter to save your changes. Press Enter to confirm the name.

4. In Cloud Shell, write following command and click on Enter, to create deployment:
gcloud deployment-manager deployments create two-vms-1 --config=simple-template-with-network.yaml
5. Return to GCP Console. In Navigation Pane, click on Compute Engine - VM Instances. Verify that there is two virtual machines, the-first-vm and the-second-vm.
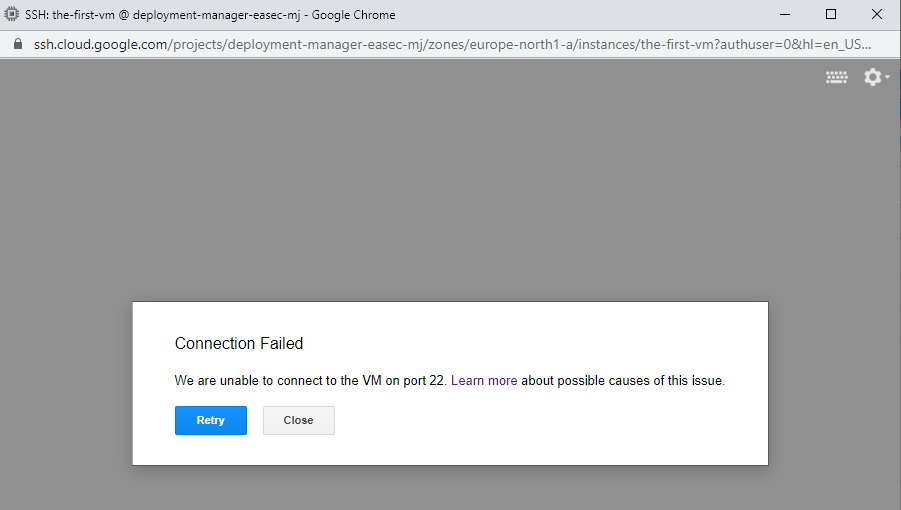
6. Click on SSH to connect with SSH to the-first-vm. Verify that you could not connect, becuse the network you created does´t have Firewall rules that allows SSH.

7. In Navigation menu, click on VPC network and verify that network "a-new-network" has been created.
Task 9: Update deployment with firewall rules that allows SSH and ICMP traffic
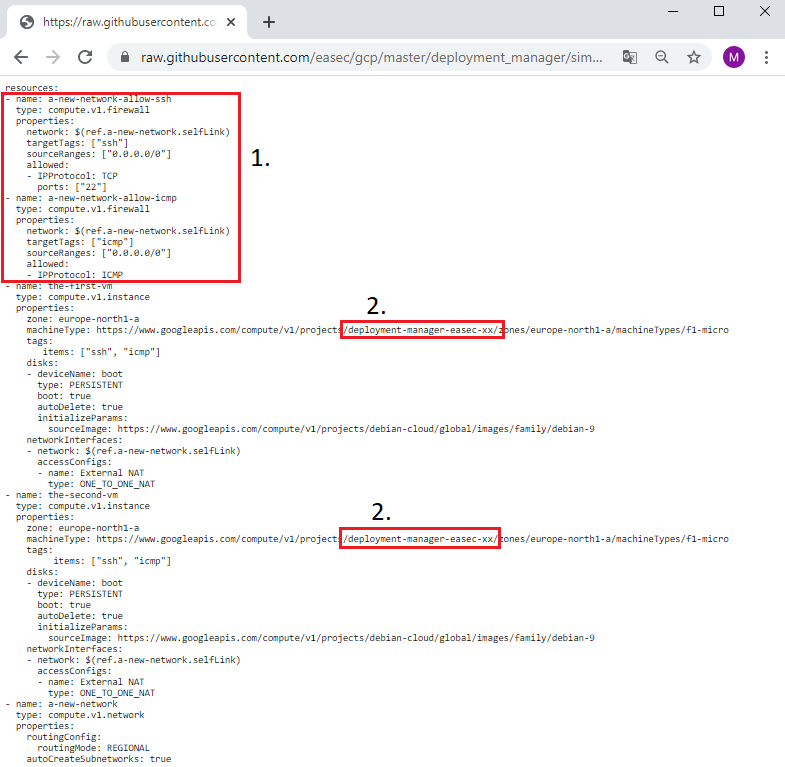
1. Note the reference for the two firewall rules. Change xx to your initials, it should be the same as the name for your project.
2. Click on ctrl + x to finish nano, write y + Enter to save your changes. Press Enter to confirm the name.

3. In Cloud Shell, write following command and click on Enter, to preview the changes:
gcloud
deployment-manager deployments update two-vms-1 --config
simple-template-with-network-and-firewall.yaml --preview

4. In Cloud Shell, write following command and click on Enter, to preview the changes:
gcloud deployment-manager deployments update two-vms-1
Note that you dont´t have to use the configuration file, becuse the system already have knowledgement about this.
5. Return to GCP Console. In Navigation menu, click on Compute Engine - VM Instances.

6. Click on SSH to connect with SSH to the-first-vm. Verify that you could connect,
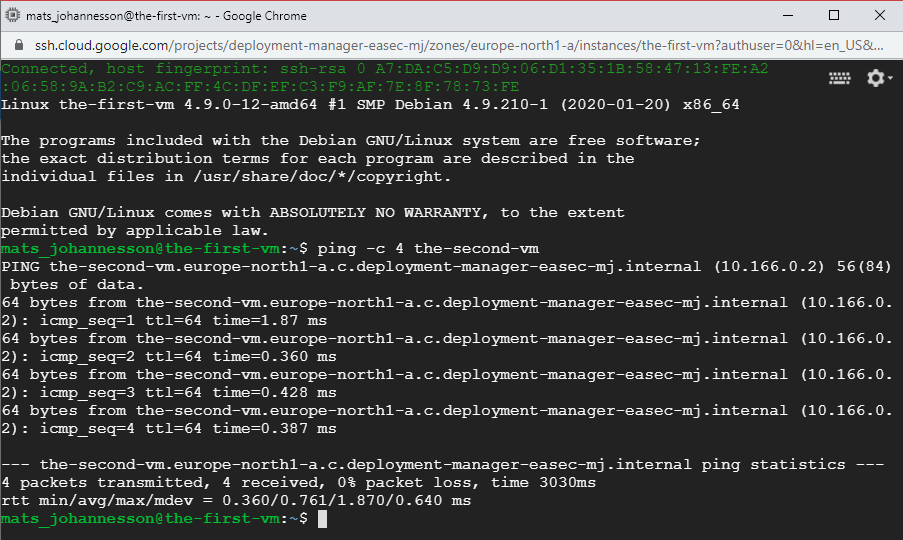
7. In the windows with SSH connection, write following command and click on Enter:
ping -c 4
the-second-vm
Task 10: See the deployment in GCP console
1. Return to GCP Console. In Navigation menu, click on Deployment Manager.

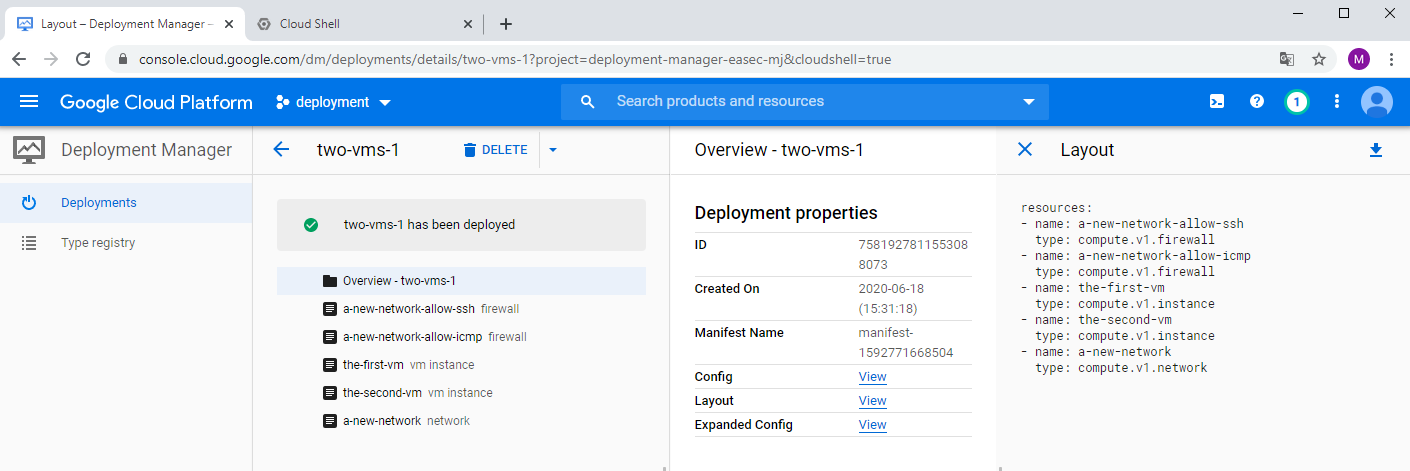
3. Click on your deployment, click on View to the right of Layout, to see the different resources that was implemented in the deployment.
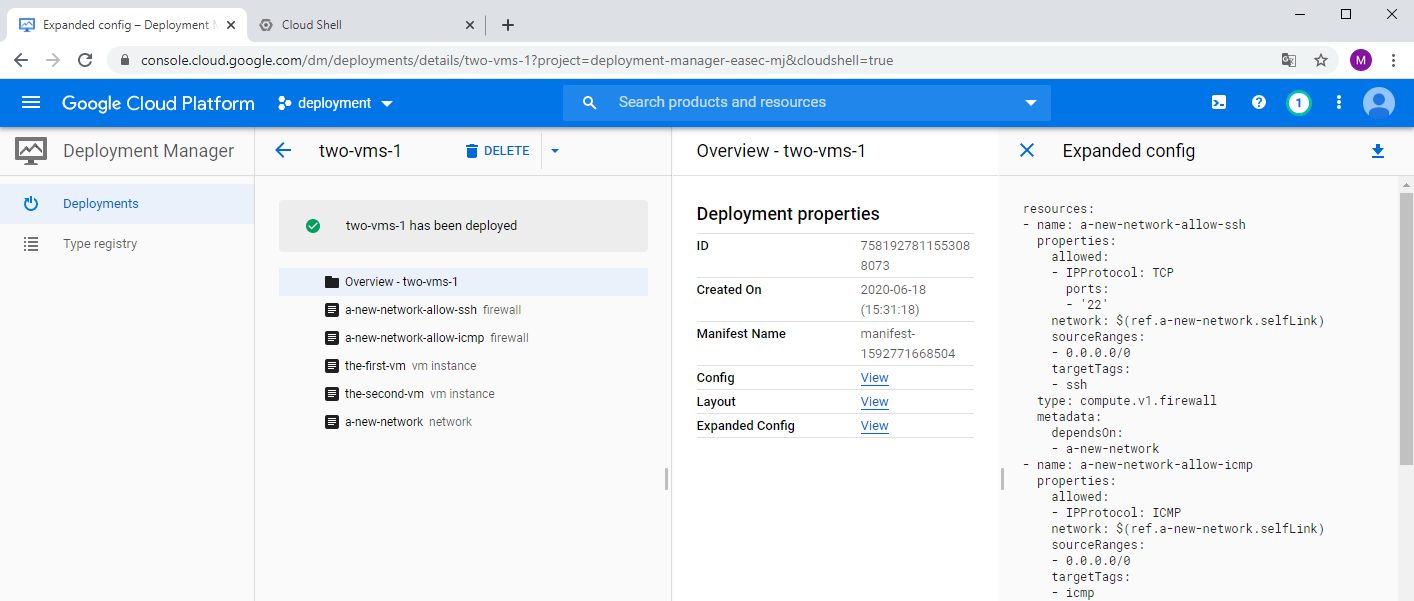
4. click on View to the right of Expand Config, to see more detailed configuration for your deployment.
Task 11: Clean up
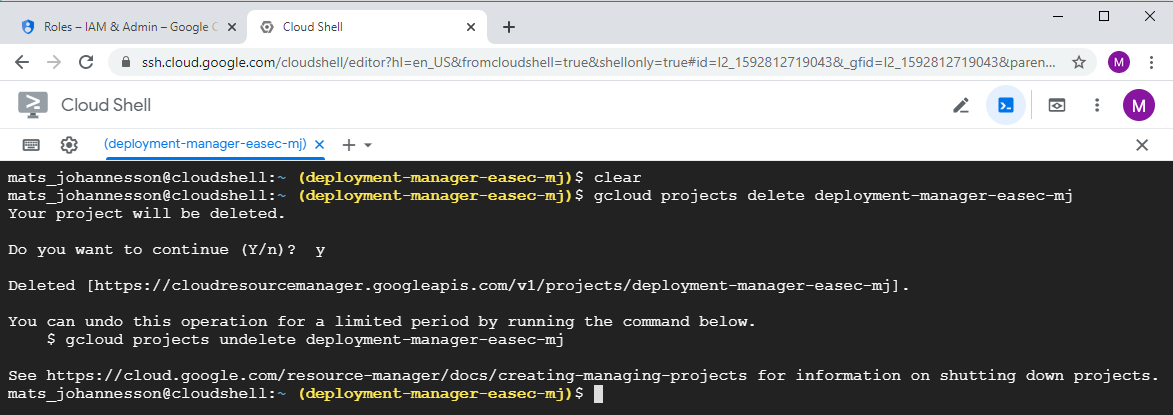
gcloud projects delete deployment-manager-easec-xx
Confirm deletion of project with a y + Enter.
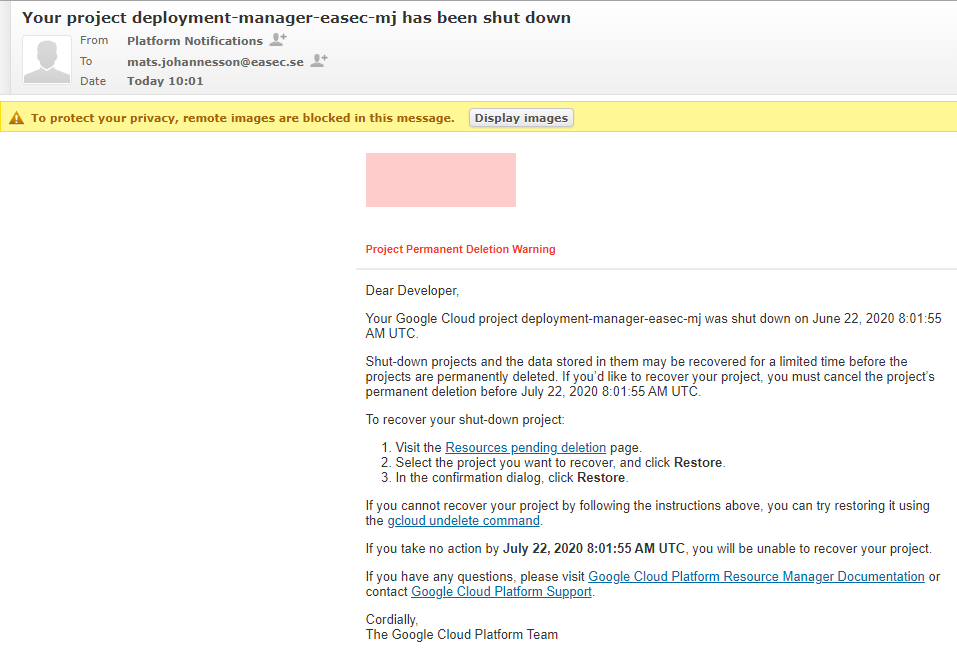
2. You will recive notification about the deletion.
In the next post, will we use Python to work with several templates for our deployments.

Förutsättning: Konto för GCP.
Arbetsuppgift 1: Anslut till konsol för GCP och logga på
1. Öppna webbläsare och skriv in URL: https://console.cloud.google.com och klicka på Enter.
2. Logga på med dina inloggningsuppgifter.
Arbetsuppgift 2: Skapa projekt och verifiera att API är påslaget
1. I konsol, expandera Navigation menu på vänstra sidan och klicka på IAM & Admin – Settings.
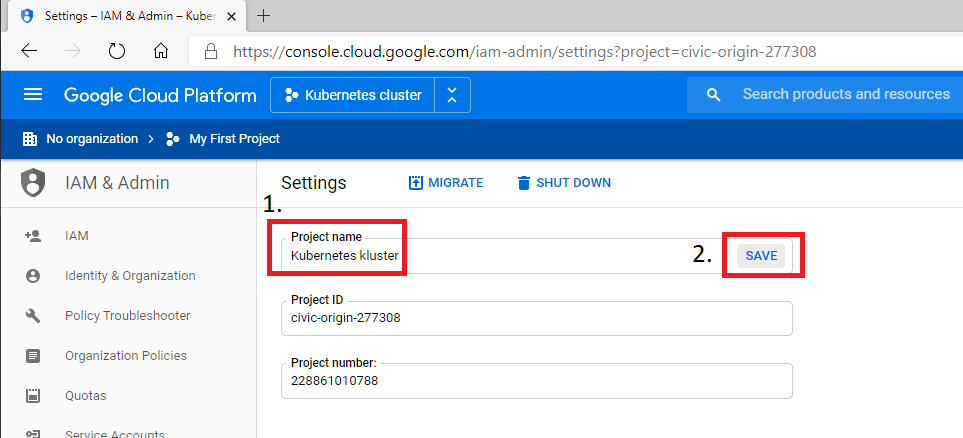
2. I fältet under Project name, skriv in nytt namn för ditt projekt, klicka sedan på SAVE.
3. Återinläs sidan och namnet kommer att förändras.
4. I konsol, expandera Navigation menu på vänstra sidan och klicka på APIs & Services - Dashboard.
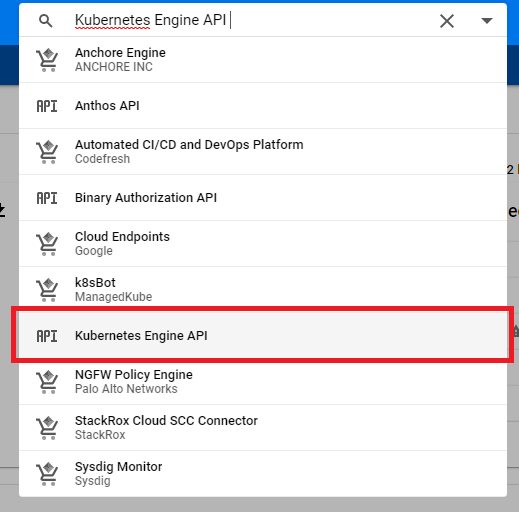
5. Skriv in Kubernetes Engine API i sökrutan och klicka på Enter. Klicka på Kubernetes Engine API i sökresultatet.
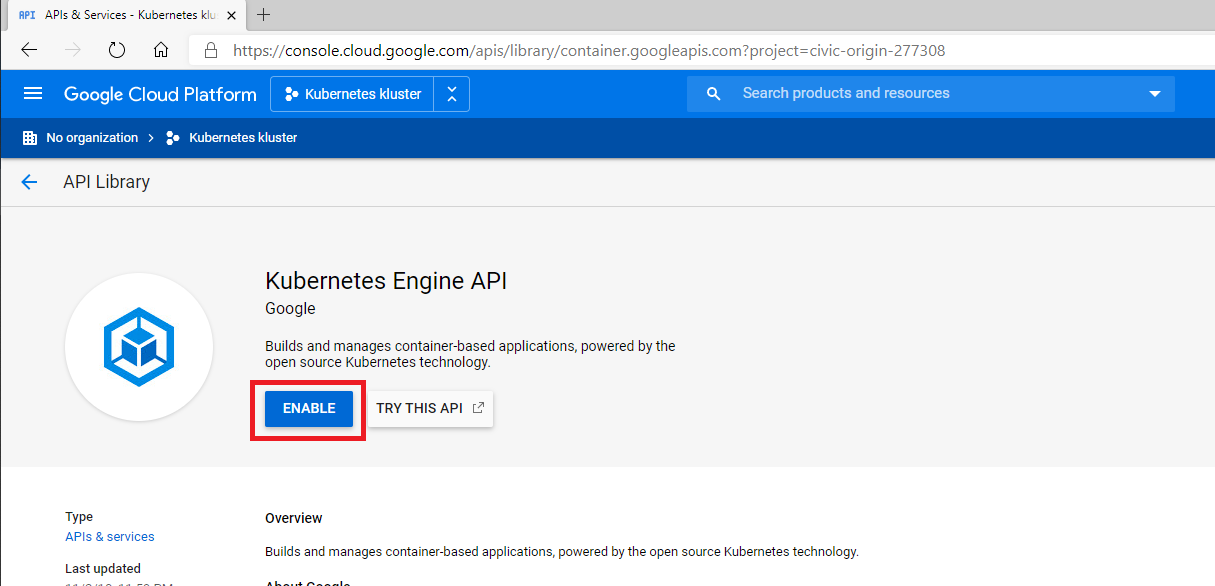
6. Klicka på ENABLE (Om API redan är påslaget, kommer det att stå DISABLE). Detta kommer att ta några minuter.

7. När API är påslaget kommer översiktsbild att visas.
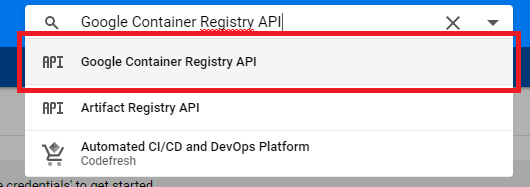
8. Skriv in Google Container Registry API i sökrutan och klicka på Enter. Klicka på Google Container Registry API i sökresultatet.
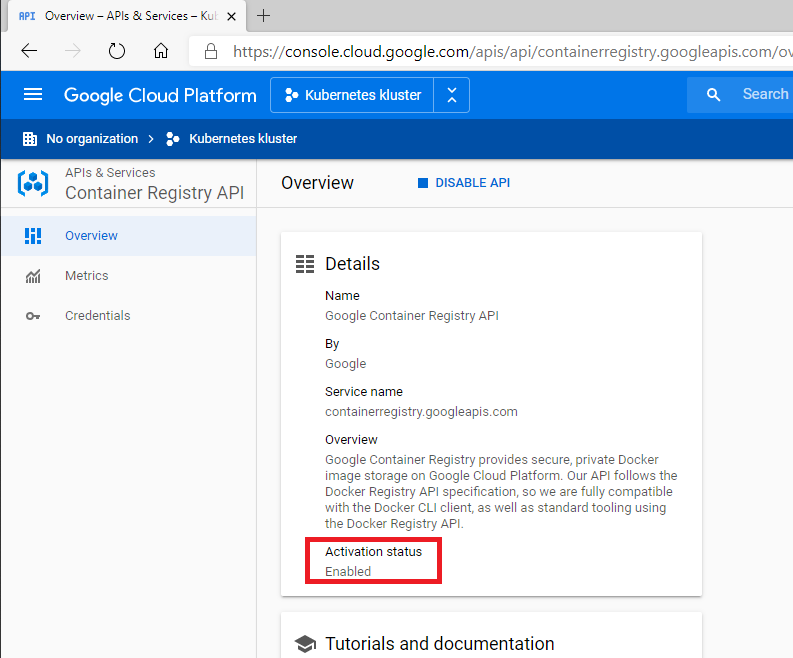
9. Verifiera att det står Enabled under Activation status.
Arbetsuppgift 3: Skapa kluster
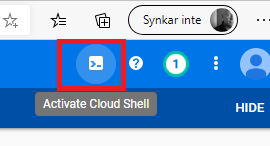
1. I den högra övre delen av konsol, klicka på ikon >_ (Activate Cloud Shell).
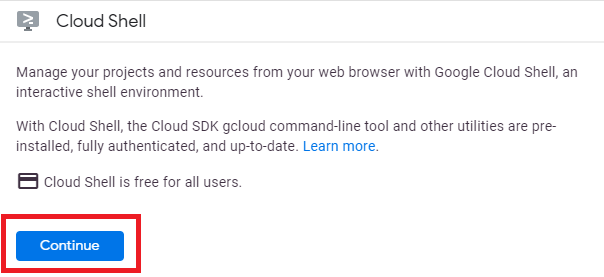
2. I nedre delen av konsol, klicka på
Continue. Virtuell maskin med Cloud Shell kommer att skapas och startas.

3. Istället för att arbeta i den nedre delen av konsolen, klicka på ikon för Open in new window, för att öppna ett nytt fönster med Cloud Shell.

4. Skriv in följande kommando och klicka på Enter, för att skapa variabel som innehåller namnet för den zon där du kommer att skapa klustret:
export MIN_ZON=europe-north1-a
För att se vilka zoner som finns tillgängliga, använd följande kommando:
gcloud compute zones list

5. Skriv in följande kommando och klicka på Enter, för att skapa kluster för webbfrontend med två (2) noder:
gcloud container clusters create webbfronten --zone $MIN_ZON --num-nodes 2

6. Efter en stund kommer klustret vara
klart, verifiera att STATUS visar RUNNING.

7. Skriv in följande kommando och klicka på Enter, för att kontrollera version:
kubectl version

8. Återgå
till konsol, expandera Navigation menu på vänstra sidan och klicka på Compute
Engine, verifiera att noder som du skapade är virtuella maskiner och att dessa
finns i den zon som du specificerade.

9. Du kan även se klustret genom att expandera Navigation menu på vänstra sidan och klicka på Kubernetes clusters, verifiera att klustret som du skapade tidigare visas.
Arbetsuppgift 4: Skapa deplyment för nginx
1. Återgå till fönstret för Cloud Shell.

2. Skriv in följande kommando och klicka på Enter, för att skapa deployment för nginx:
kubectl create deployment nginx --image=nginx:latest

2. Deployment består av en pod, för att verifiera detta skriv in följande kommando och klicka på Enter:
kubectl get pods
Arbetsuppgift 5: Exponera pod för åtkomst från Internet (LoadBalancer)

1. I fönstret för Cloud Shell, skriv in följande kommando och klicka på Enter:
kubectl expose deployment nginx --port 80 --type LoadBalancer
LoadBalancer exponeras som en tjänst (services). I .easec:s modul Kubernetes beskrivs de olika kopplingarna som kan göras, bland annat med NodePort.

2. I fönstret för Cloud Shell, skriv in följande kommando och klicka på Enter, för att se information om extern IP-adress (Kan ta en liten stund!):
kubectl get services
Notera extern IP-adress.

3. Öppna ny flik i din webbläsare, skriv in extern IP-adress och klicka på Enter. Standardsida för nginx visas.

4. I fönstret för Cloud Shell, skriv in följande kommando och klicka på Enter, för att skala din deployment:
kubectl scale deployment nginx --replicas 4
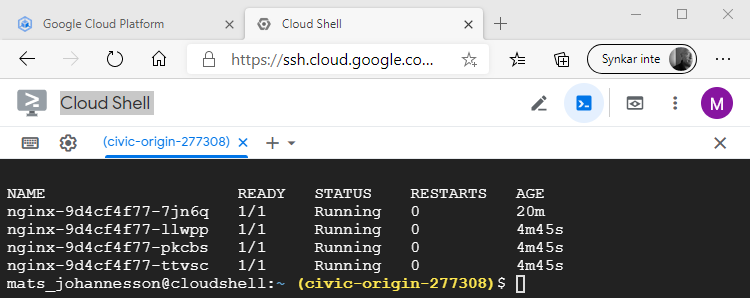
5. I fönstret för Cloud Shell, skriv in följande kommando och klicka på Enter, för att se pods:
kubectl get pods

6. I fönstret för Cloud Shell, skriv in följande kommando och klicka på Enter, för att se på vilka noder som pods körs på:
kubectl get pods -o wide
Två pods körs på respektive nod. Lägg märke till att respektive pod har en unik IP-adress.
I verklig miljö så kan du styra hur dessa pods kommer att fördelas. I .easec:s modul Kubernetes tittar vi på detta. Det kommer att komma ett blogginlägg om detta. I Kubernetes är det Scheduler som hanterar detta.

Bilden ovan visar två typer av undersökningar som kan göras (det finns fler), tillgång av resurser och etikett (label).

7. Återgå till konsol, expandera Navigation menu på vänstra sidan och klicka på Kubernetes Engine – Services & Ingress, notera att tjänsten visas i konsol.
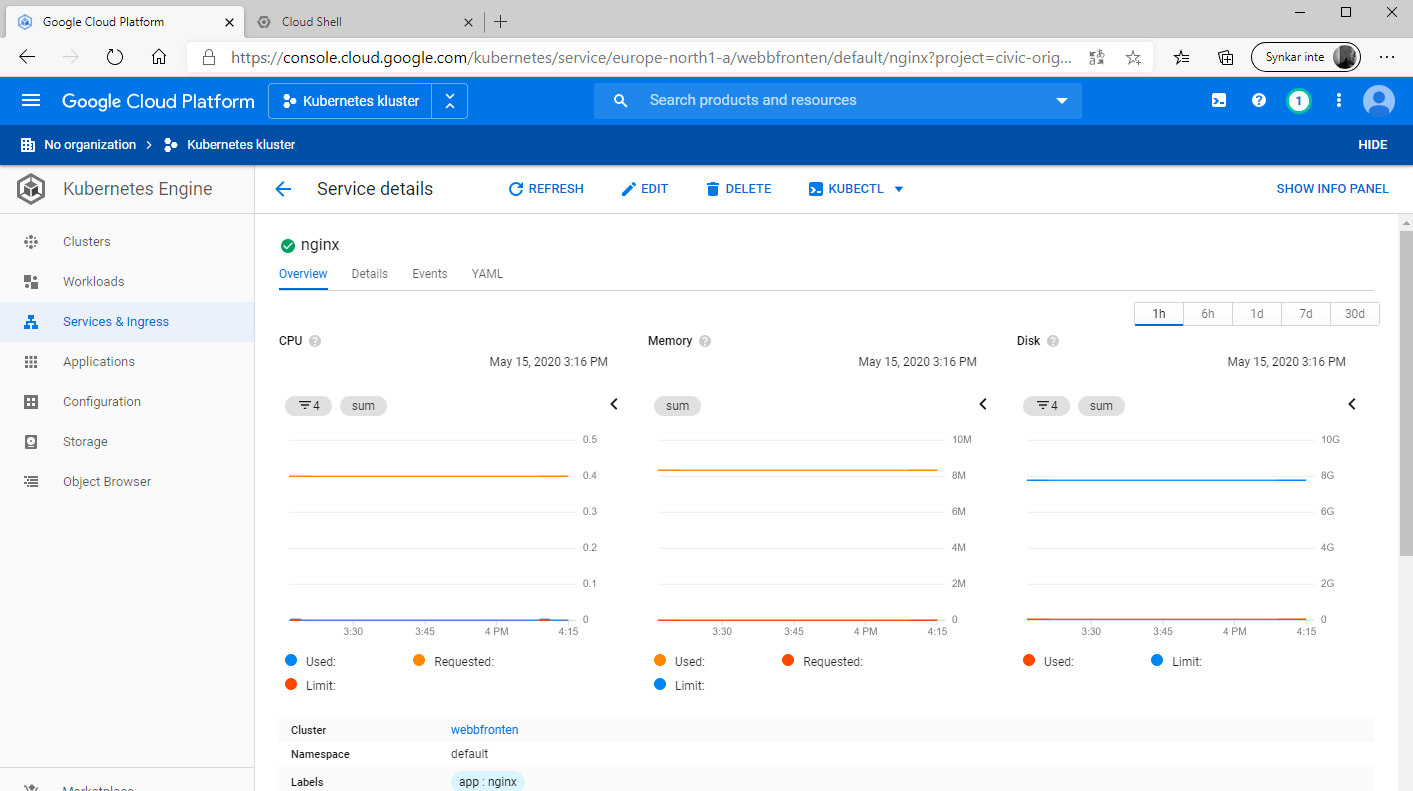
8. Dubbelklicka på din tjänst, i fliken Overview får du en översiktsbild för din tjänst.
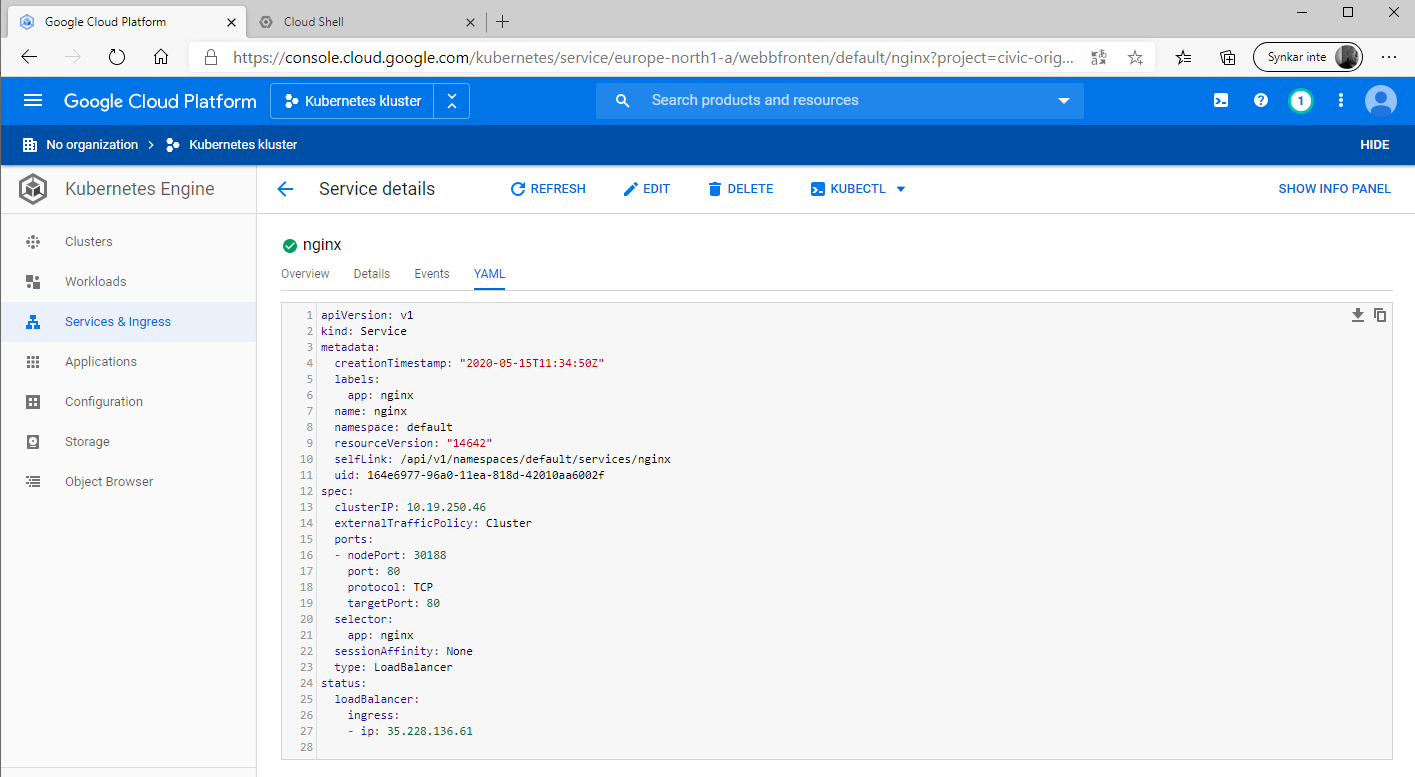
9. Klicka på fliken YAML för att se konfigurationsfil för din funktion.
Arbetsuppgift 6: Städa upp

1. I fönstret för Cloud Shell, skriv in följande kommando och klicka på Enter:
kubectl delete deployment nginx

2. I fönstret för Cloud Shell, skriv in följande kommando och klicka på Enter, för att verifiera att pods är borttagna:
kubectl get pods
Kommandot resulterar i att inga pods finns.

3.cI fönstret för Cloud Shell, skriv in följande kommando och klicka på Enter, för att ta bort tjänst (nginx):
kubectl delete service nginx

4. I fönstret för Cloud Shell, skriv in följande kommando och klicka på Enter, för att kontrollera att tjänst är borta:
kubectl get services

5. I fönstret för Cloud Shell, skriv in följande kommando och klicka på Enter, för att ta bort klustret:
gcloud container clusters delete webbfronten --zone $MIN_ZON
Skriv in ett Y och klicka på Enter för att bekräfta att du vill ta bort.
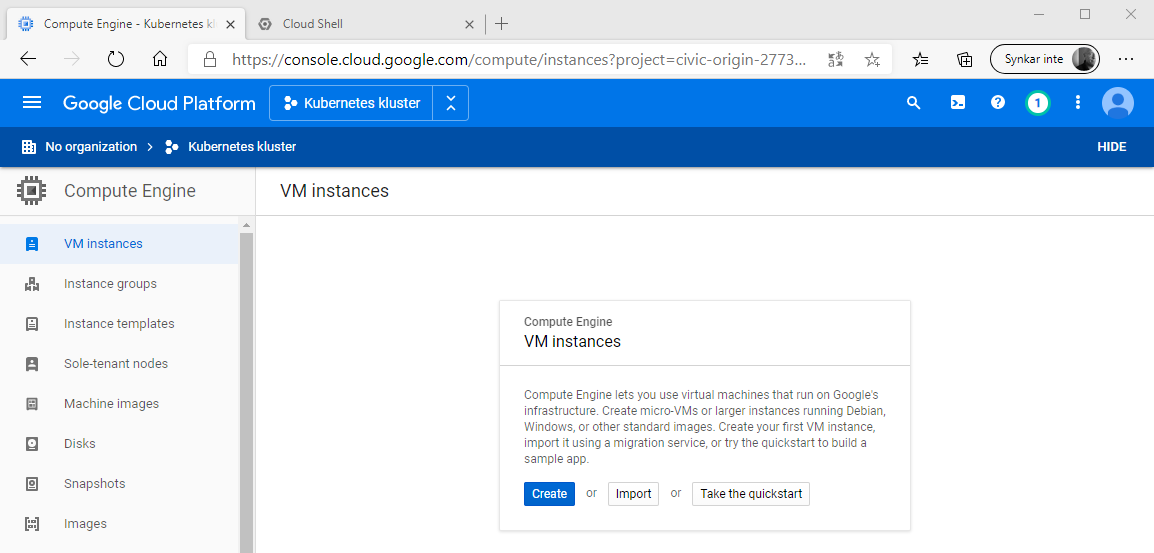
6. Återgå till konsol, expandera Navigation menu på vänstra sidan och klicka på Compute Engine, verifiera att noder som skapades tidigare är borta.
Du är klar!
