Inlägg i blogg av Mats Johannesson

Prerequisite: Account for GCP and login to the console.
Task 1: Create project and connect to it

1. In the consol, click on Activate Cloud Shell.
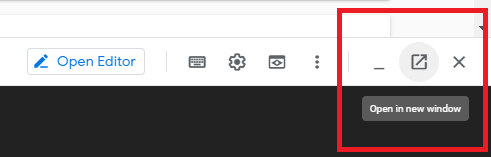
2. When Cloud Shell has opened, click on Open in new window to make it easier for you to work in.

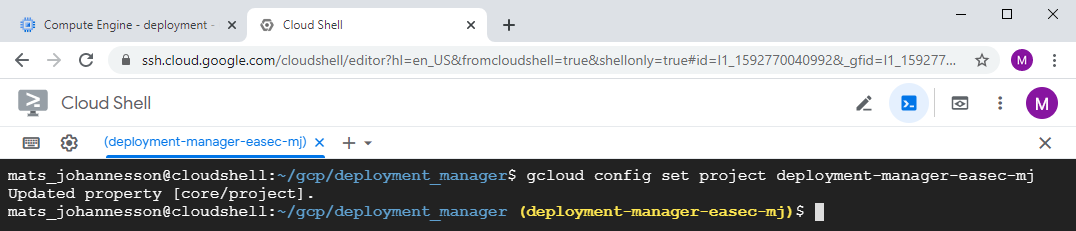
3. In Cloud Shell, write the following command and press Enter, to create a project with the name deployment-manager-easec-xx:
gcloud projects create deployment-manager-easec-xx --name="deployment" --labels=type=deployment
Replace xx with your initials. If the name already exist, put in a extra character to make it unique.
4. In Cloud Shell, write the following command and press Enter to move to the newly created project
gcloud config set project deployment-manager-easec-xx
Task 2: Linking billing account to your project
1. Go back to GCP console, click first on your project and then choose Billing in the Navigation menu.
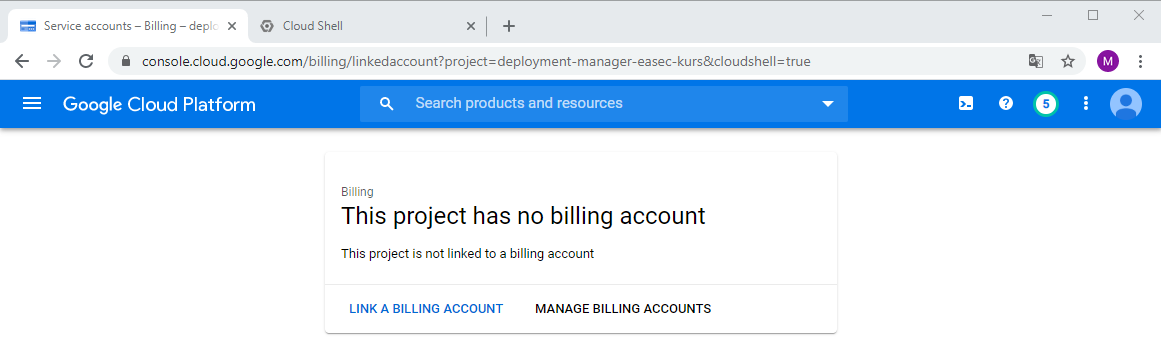
2. Click on LINK A BILLING ACCOUNT.
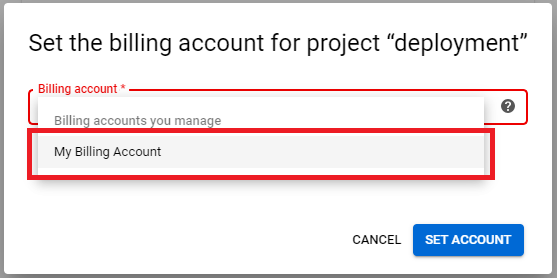
3. Click on dropdownbox and choose My Billing Account, click on SET ACCOUNT.
Task 3: Show and edit .yaml-file for deployment
1. Go back to Cloud Shell, write following command and press Enter to clone .easec:s repository:
git clone https://github.com/easec/gcp/
2. Write following command and press Enter to move to folder gcp/deployment_manger:
cd gcp/deployment_manager/
3. Write following command and press Enter to open simple_template.yaml in nano:
nano simple-template.yaml
Note: there is two resources defined; the-first-vm and the-second-vm.
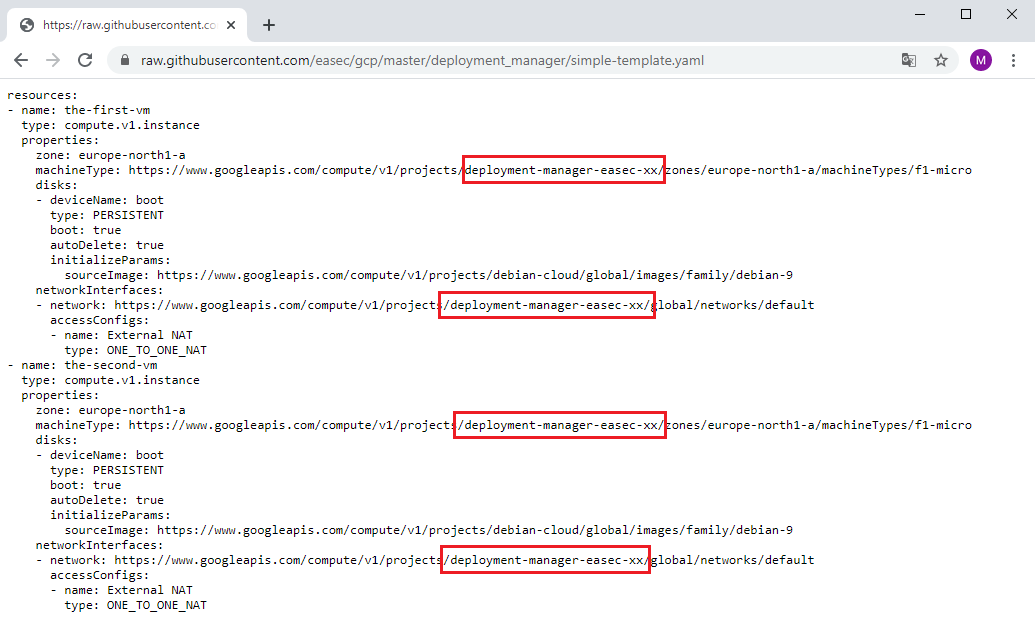
4. Change xx to your initials, it should be the same as the name for your project.
5. Click on ctrl + x to finish nano, write y + Enter to save your changes. Press Enter to confirm the name.
Task 4: Deploy the deployment

1. In the Cloud Shell, write following command and press Enter to activate the API:
gcloud services enable compute.googleapis.com
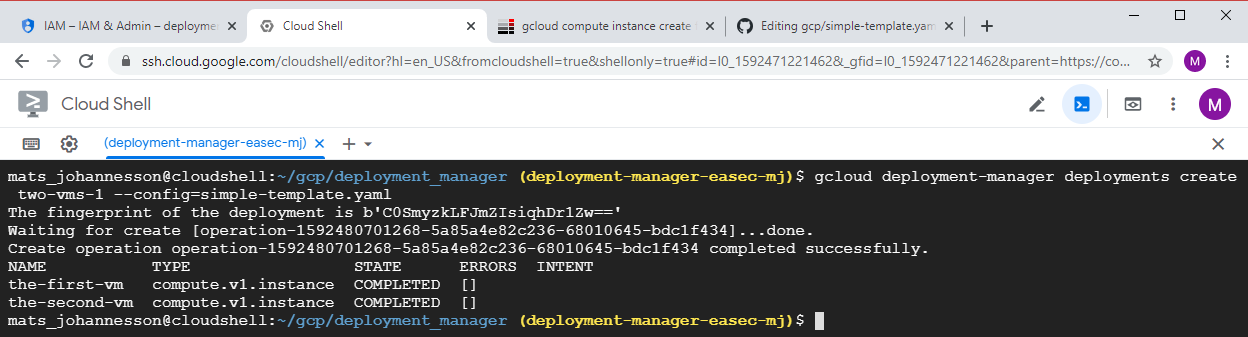
gcloud deployment-manager deployments create two-vms-1 --config=simple-template.yaml
Answer the question "API [deploymentmanager.googleapis.com] not enabled on project y/n" with a y and press Enter.
Task 5: Verify the deployment
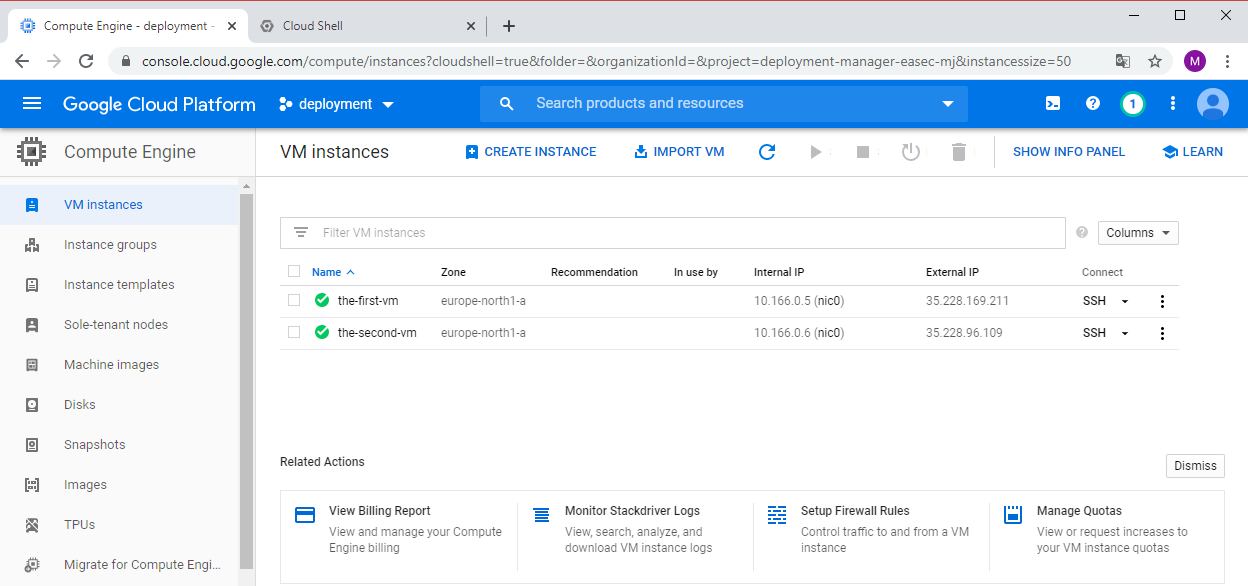
1. Return to GCP Console. In Navigation menu, click on Compute Engine - VM Instances. Verify that there is two virtual machines, the-first-vm and the-second-vm.
2. Click on SSH to connect with SSH to the-first-vm. Verify that you could connect. You could connect becuse the machines use the Default network, this network has Firewall rules that allows SSH.
Task 6: Show manifest for the deployment
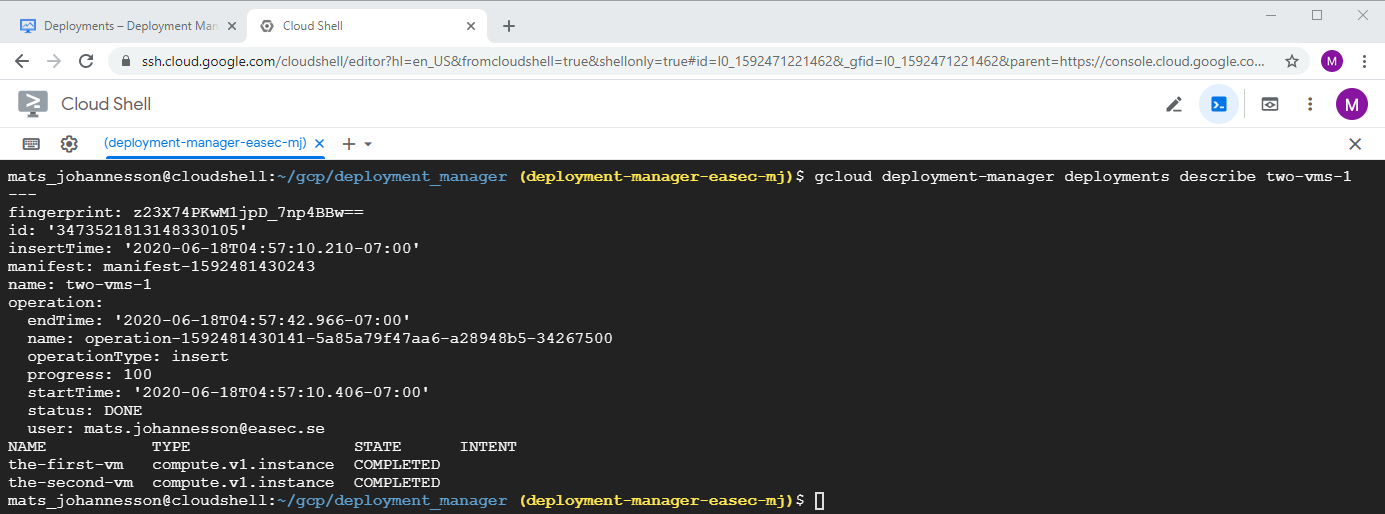
1. Return to Cloud Shell, write following command and click on Enter, to show information about deployment:
gcloud deployment-manager deployments describe
two-vms-1
Task 7: Remove deployment
1. In Cloud Shell, write following command and click on Enter, to show information about deployment:
gcloud deployment-manager deployments
delete two-vms-1
Write y + Enter to confirm that you will remove the deployment.
Task 8: Create deployment with network
1. In Cloud Shell, write following command and click on Enter, to open and edit simple-template-with-network.yaml:
nano simple-template-with-network.yaml
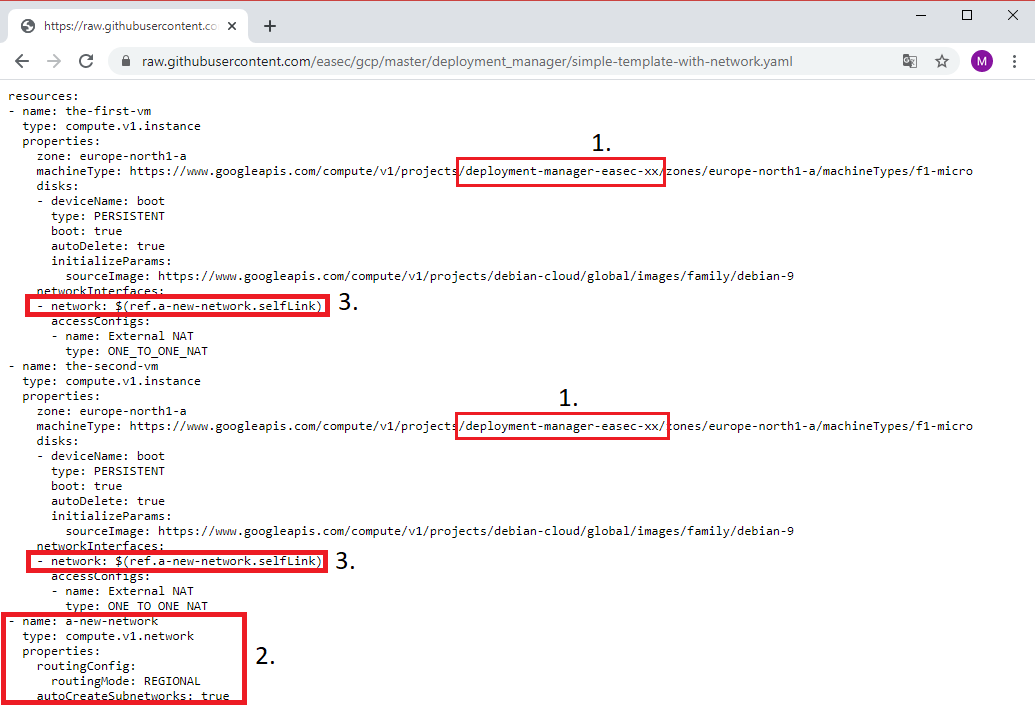
2. Change xx to your initials, it should be the same as the name for your project (1). The network is defined as seperate resource (2) and the I use reference (3) to the defined network for both the-first-vm and the-second-vm. You could read more on references here: https://cloud.google.com/deployment-manager/docs/configuration/use-references (new window).
3. Click on ctrl + x to finish nano, write y + Enter to save your changes. Press Enter to confirm the name.

4. In Cloud Shell, write following command and click on Enter, to create deployment:
gcloud deployment-manager deployments create two-vms-1 --config=simple-template-with-network.yaml
5. Return to GCP Console. In Navigation Pane, click on Compute Engine - VM Instances. Verify that there is two virtual machines, the-first-vm and the-second-vm.
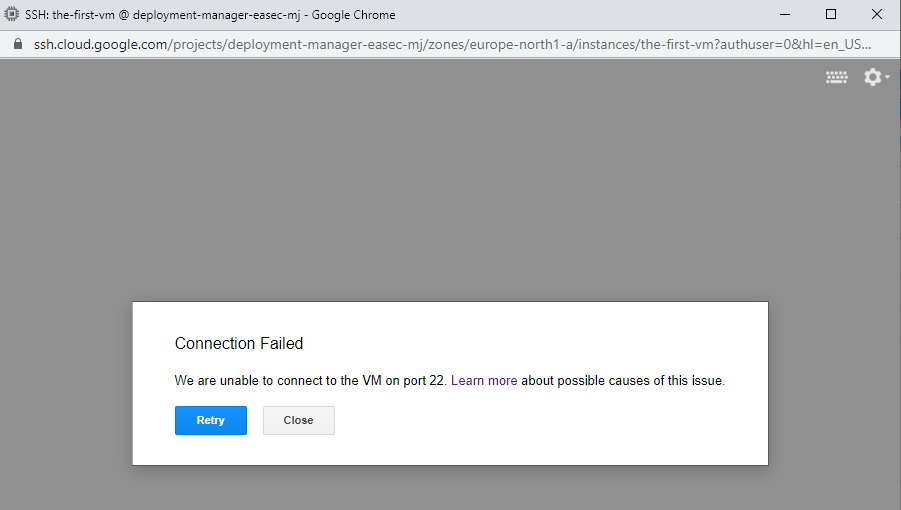
6. Click on SSH to connect with SSH to the-first-vm. Verify that you could not connect, becuse the network you created does´t have Firewall rules that allows SSH.
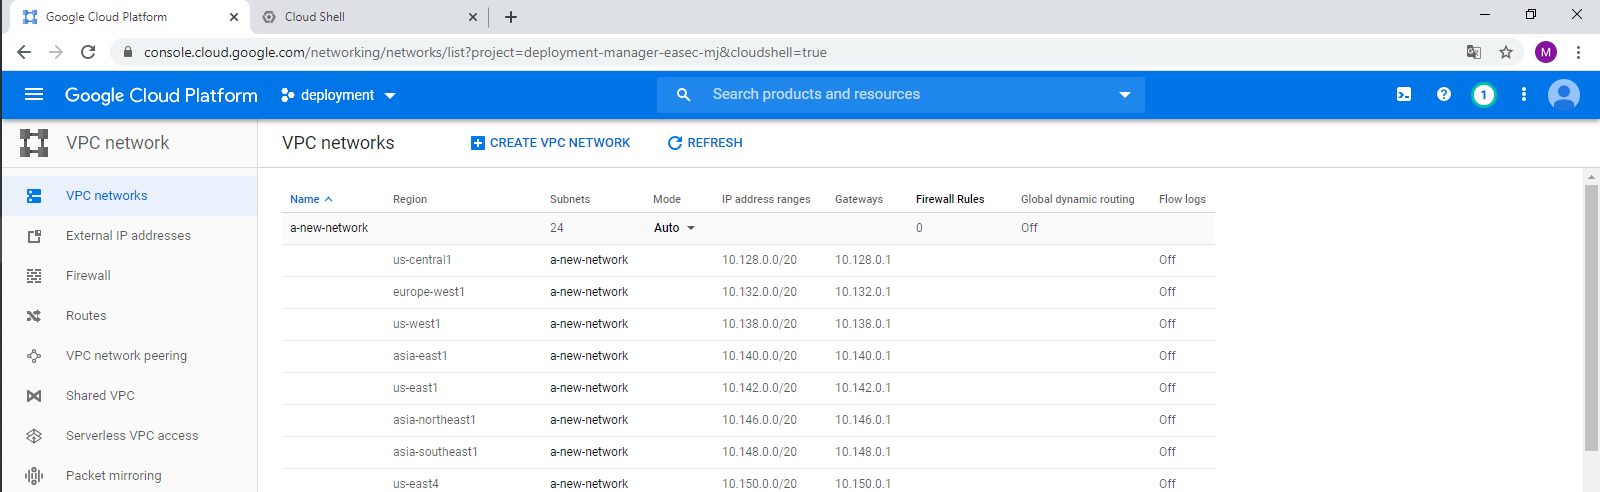
7. In Navigation menu, click on VPC network and verify that network "a-new-network" has been created.
Task 9: Update deployment with firewall rules that allows SSH and ICMP traffic
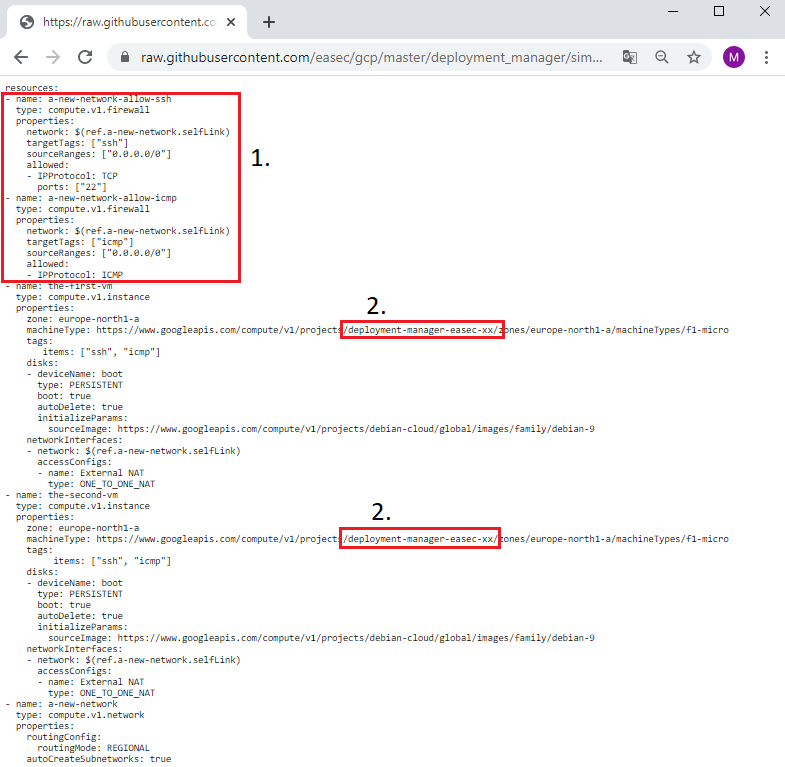
1. Note the reference for the two firewall rules. Change xx to your initials, it should be the same as the name for your project.
2. Click on ctrl + x to finish nano, write y + Enter to save your changes. Press Enter to confirm the name.
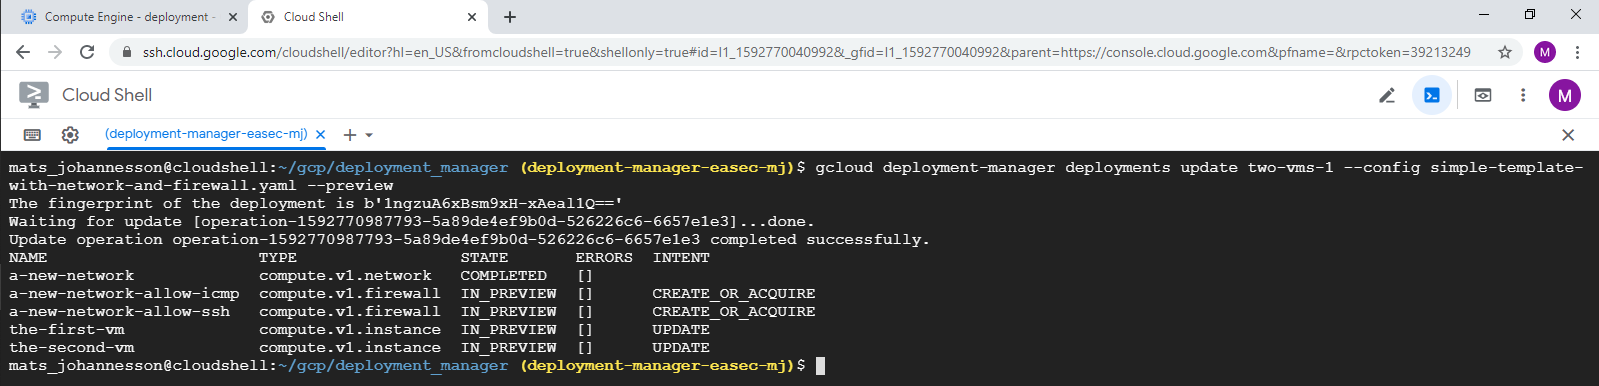
3. In Cloud Shell, write following command and click on Enter, to preview the changes:
gcloud
deployment-manager deployments update two-vms-1 --config
simple-template-with-network-and-firewall.yaml --preview
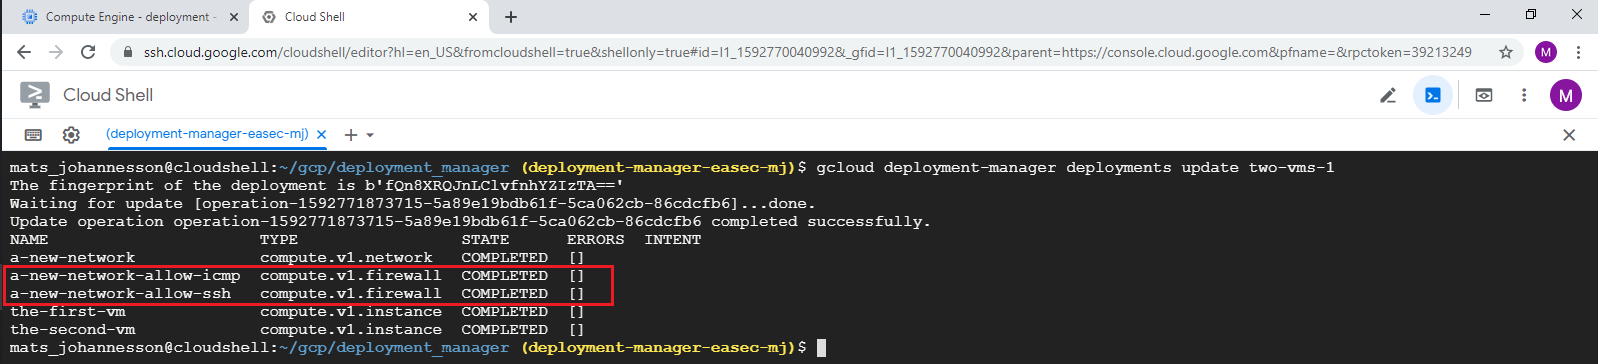
4. In Cloud Shell, write following command and click on Enter, to preview the changes:
gcloud deployment-manager deployments update two-vms-1
Note that you dont´t have to use the configuration file, becuse the system already have knowledgement about this.
5. Return to GCP Console. In Navigation menu, click on Compute Engine - VM Instances.
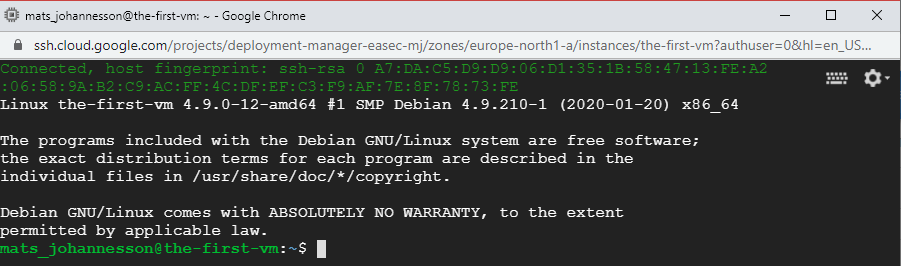
6. Click on SSH to connect with SSH to the-first-vm. Verify that you could connect,
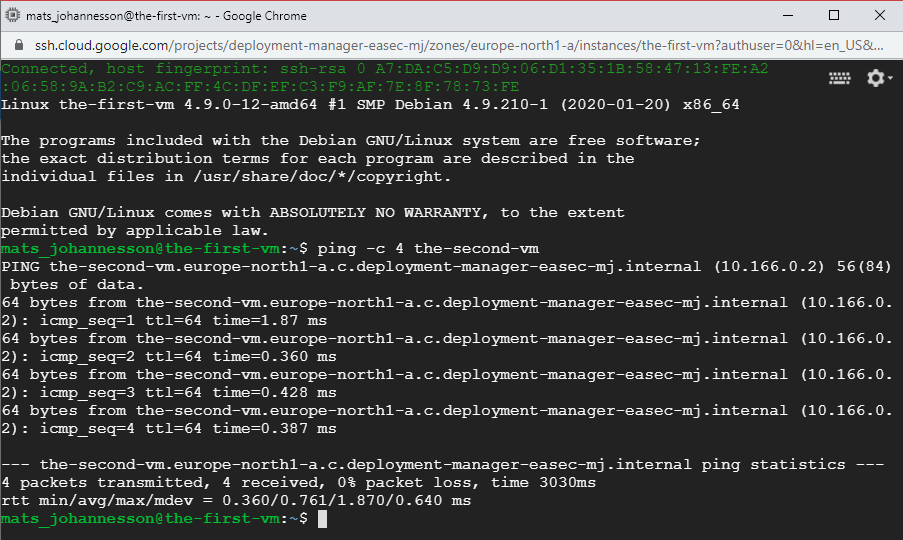
7. In the windows with SSH connection, write following command and click on Enter:
ping -c 4
the-second-vm
Task 10: See the deployment in GCP console
1. Return to GCP Console. In Navigation menu, click on Deployment Manager.

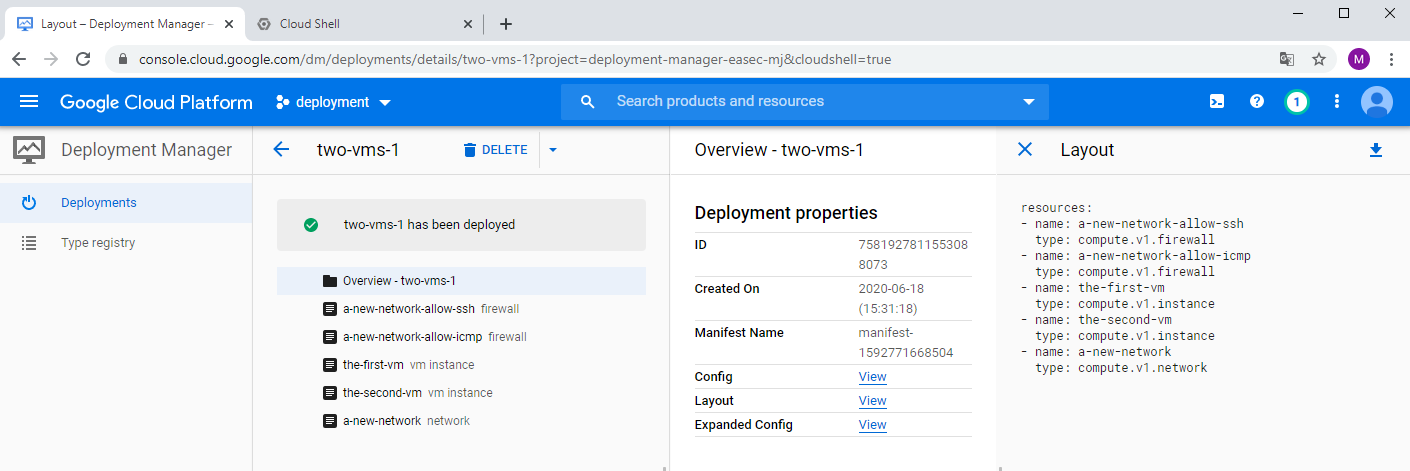
3. Click on your deployment, click on View to the right of Layout, to see the different resources that was implemented in the deployment.
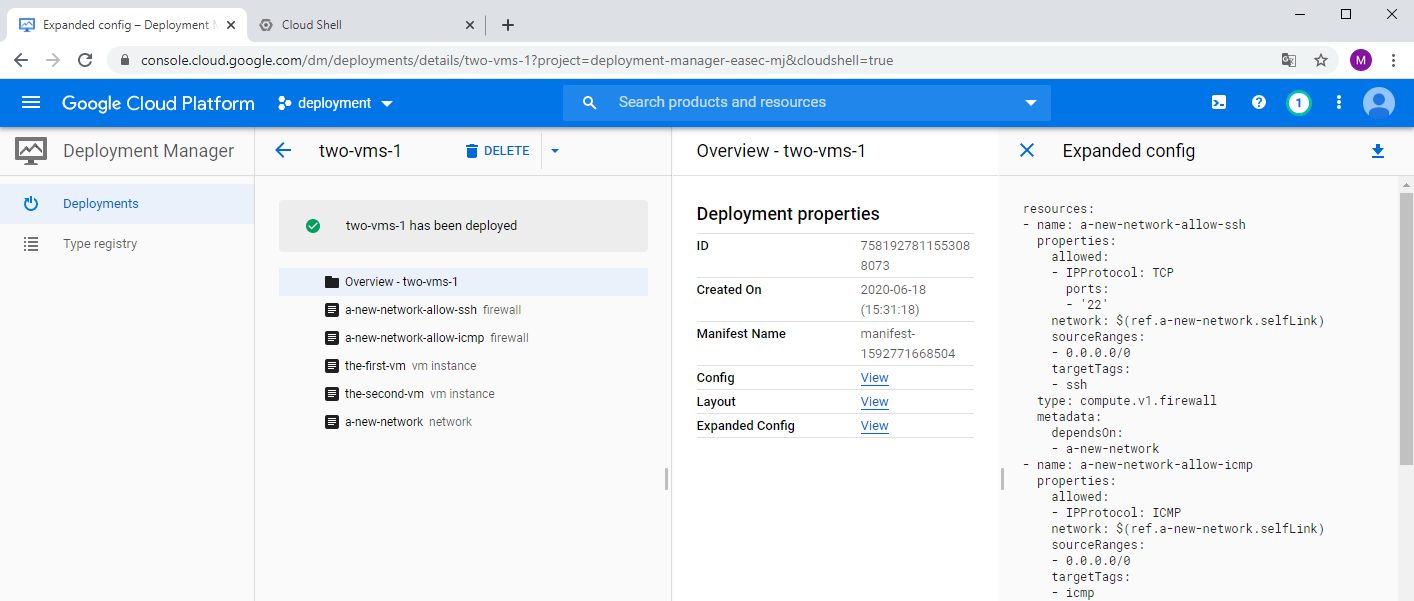
4. click on View to the right of Expand Config, to see more detailed configuration for your deployment.
Task 11: Clean up
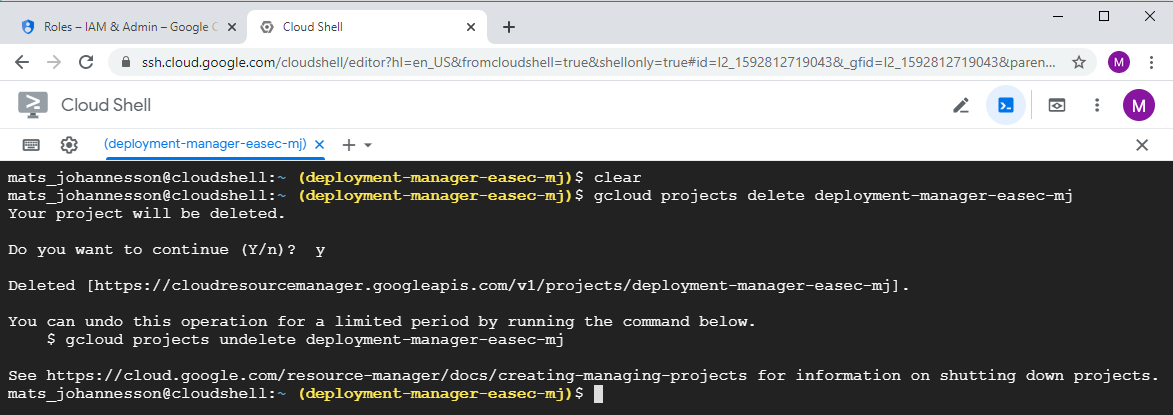
gcloud projects delete deployment-manager-easec-xx
Confirm deletion of project with a y + Enter.
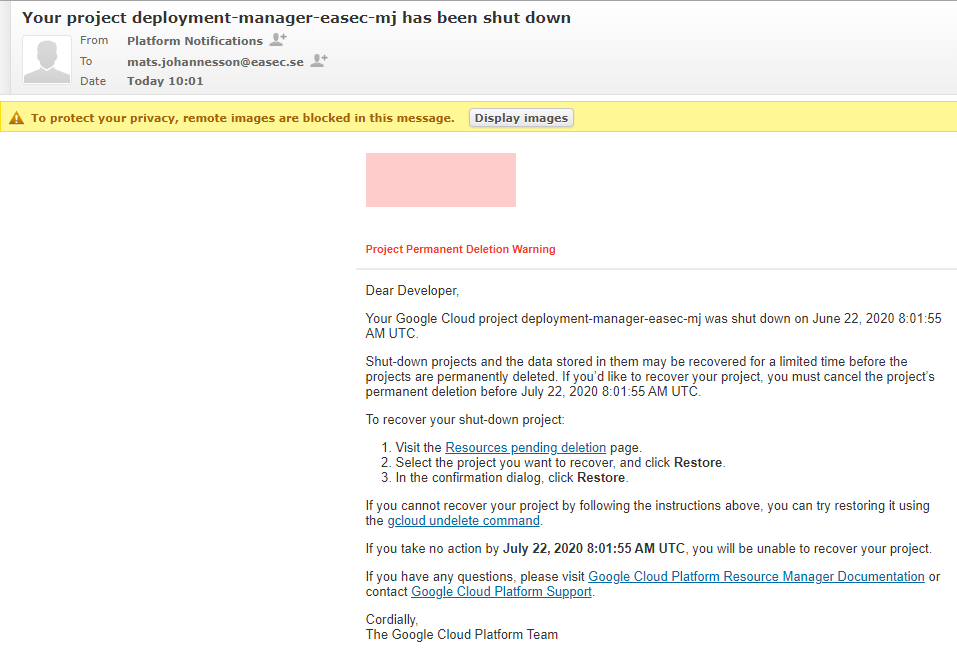
2. You will recive notification about the deletion.
In the next post, will we use Python to work with several templates for our deployments.